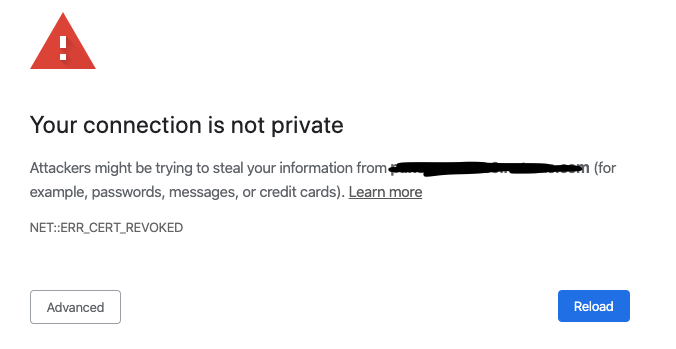
If you upgraded to macOS Catalina (10.15) and use Chrome, you might be seeing this message in your web browser for websites that worked before the upgrade.

New SSL Trusted Certificate Requirements
After you upgrade to iOS 13 or macOS 10.15 (Catalina), Apple has upped its security requirements on SSL certs.
According to Apple:
Requirements for trusted certificates in iOS 13 and macOS 10.15
All TLS server certificates must comply with these new security requirements in iOS 13 and macOS 10.15:
- TLS server certificates and issuing CAs using RSA keys must use key sizes greater than or equal to 2048 bits. Certificates using RSA key sizes smaller than 2048 bits are no longer trusted for TLS.
- TLS server certificates and issuing CAs must use a hash algorithm from the SHA-2 family in the signature algorithm. SHA-1 signed certificates are no longer trusted for TLS.
- TLS server certificates must present the DNS name of the server in the Subject Alternative Name extension of the certificate. DNS names in the CommonName of a certificate are no longer trusted.
Additionally, all TLS server certificates issued after July 1, 2019 (as indicated in the NotBefore field of the certificate) must follow these guidelines:
- TLS server certificates must contain an ExtendedKeyUsage (EKU) extension containing the id-kp-serverAuth OID.
- TLS server certificates must have a validity period of 825 days or fewer (as expressed in the NotBefore and NotAfter fields of the certificate).
Connections to TLS servers violating these new requirements will fail and may cause network failures, apps to fail, and websites to not load in Safari in iOS 13 and macOS 10.15.
How to Fix NET::ERR_CERT_REVOKED Error In Chrome After Catalina Upgrade
Update the Server Certificate to Meet New Standards
This one should be obvious, but sometimes getting the server owner to do such a thing might not be a quick fix.
How to “Always Trust” an SSL Certificate From a Website
- press cmd + space
- type
terminal

- press enter
- cd to your home directory
-
cd ~
-
- Download the SSL Certificate from the remote web server and save it to a filename called ‘mycertfile.pem’ by pasting in this syntax.
openssl s_client -showcerts -connect remote.server.FQDN.com:443 </dev/null 2>/dev/null|openssl x509 -outform PEM >mycertfile.pem- For example, if the remote server Fully Qualified Domain Name (FQDN) is funnycats.com the syntax would look like this…
-
openssl s_client -showcerts -connect funnycats.com:443 </dev/null 2>/dev/null|openssl x509 -outform PEM >mycertfile.pem
-
- Open keychain access
- press cmd + space
- type
keychain access

- press enter
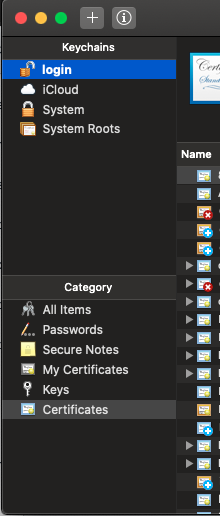
- Click on
loginon the top left - Click on
Certificatesin the bottom left
- Click on

- Click the
+plus sign on the top left- A popup window will appear and navigate to your home directory and select the
mycertfile.pem - Click
open
- A popup window will appear and navigate to your home directory and select the

- Scroll down to the certficate name, should be the fully qualified hostname of the remote server, like funnycats.com or whatever.
- Right-Click on it and Select
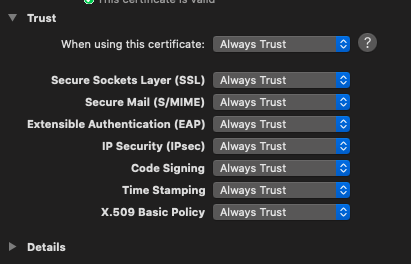
Get Info - Click the
TrustSection to expand it - In the box that says, “When using this certificate:” Select “Always Trust” from the drop down.
- Right-Click on it and Select

- Close the window, by clicking the red ‘x’ close button
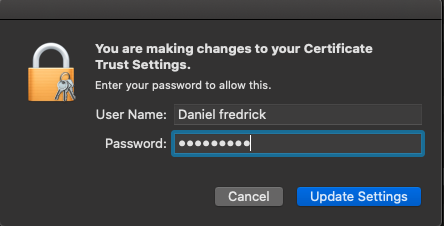
- A pop-up will appear asking you for your username and password to update the settings

- Enter your username and password and click “update settings”
- You are all set!


Thanks Daniel for the blog. I ran into the same issue. Using your instructions, I created a shell script in case I run into this again.
#!/bin/zsh
if [ “$1” = “” ]
then
echo “We need a host and port”
echo “Example: ”
echo ” $0 hostname 443″
echo “If no port is provided, 443 is assumed”
exit
fi
if [ “$2” != “” ]
then
MyPort=$2
else
MyPort=443
fi
echo “Using $0 $1 $MyPort”
openssl s_client -showcerts -connect $1:$MyPort /dev/null|openssl x509 -outform PEM >mycertfile.pem
Cool, I love to see stuff like this. At my job, I always say, “You cannot automate before you document”. Thanks for taking that next step 🙂